Light Engineering
June 2020
Light travels in straight lines. This is fortunate, since it allows us to precisely engineer light pipes that manipulate, re-direct and disperse the light in a controlled manner. Light pipe engineering is where optics and mechanical design meet.
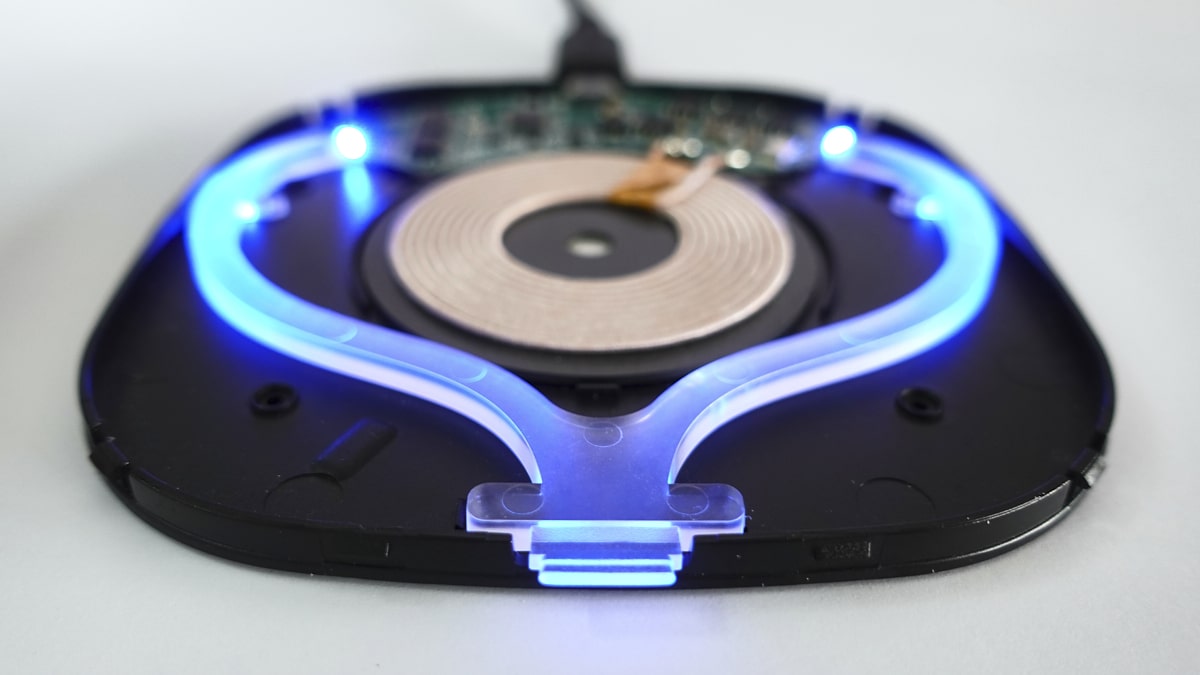
Why use light pipes? It's hard to find a piece of consumer electronics without a status LED or two. The wireless charger below is typical. It uses a long, molded light pipe to join the LEDs mounted on the rear PCB to the small front casing aperture. Doing so saves the cost and manufacturing complexity of using a much larger, or secondary, PCB. Light pipes are cheap and versatile, enabling the light to be routed in 3D anywhere within the product.
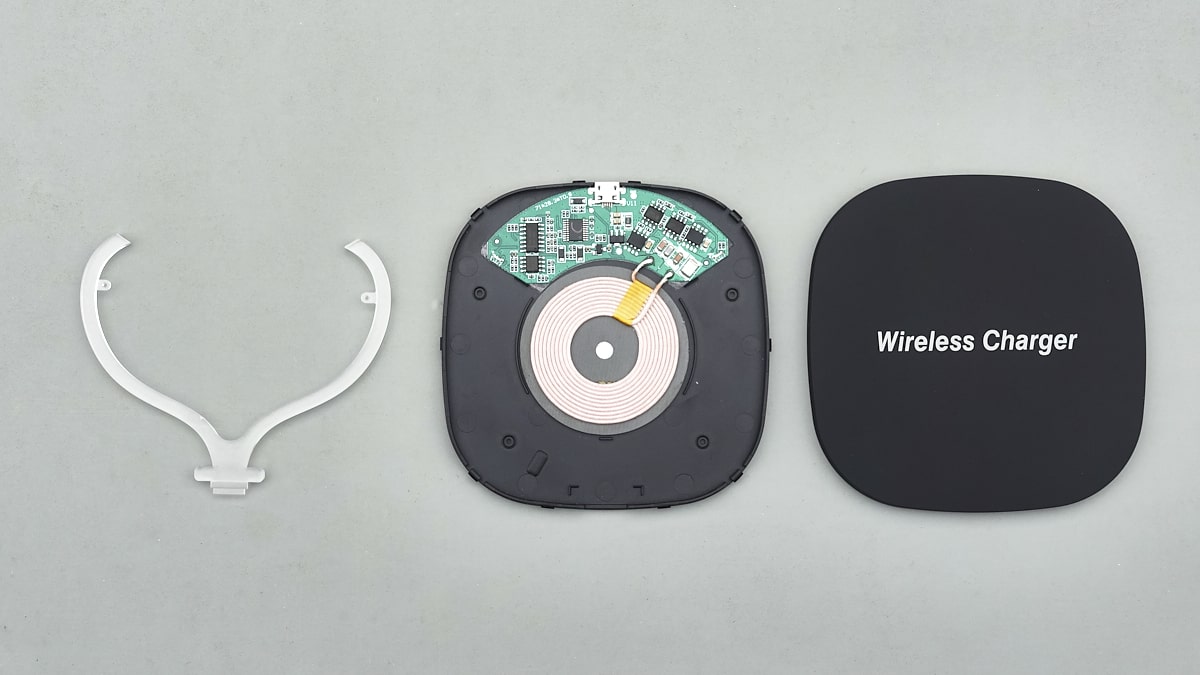
This light pipe design, however, is terrible. It seems that the Wirless Charger print on the casing isn't the only design crime on show. But to understand why it's so bad, we need to start with some theory...
Total internal reflection
Total internal reflection (TIR) is the key to light pipe operation.
When a light ray passes between mediums of differing refractive indexes, the light ray is bent. You may recall a school experiment involving a block of perspex and a light beam which demonstrated how this occured. Snell's law defines the size of this bend. Typically values of n in air (n=1) or acrylic (n=1.5) are listed on Wikipedia.

The RayViz simulation below shows collimated light entering a light pipe, bending towards the normal as it does. It then totally internally reflects until exiting at the opposite end, bending away from the normal.

The critical angle defines the minimum angle for which light will totally internally reflect. It applies when moving from a higher refractive index material to a lower one. Assuming the lower density material is air (n=1), then the angle is defined by:

Adding a slight taper to the light pipe shows how the angle of TIR increases until the 7th collision. Here the angle is smaller than the critical angle, and the light escapes.
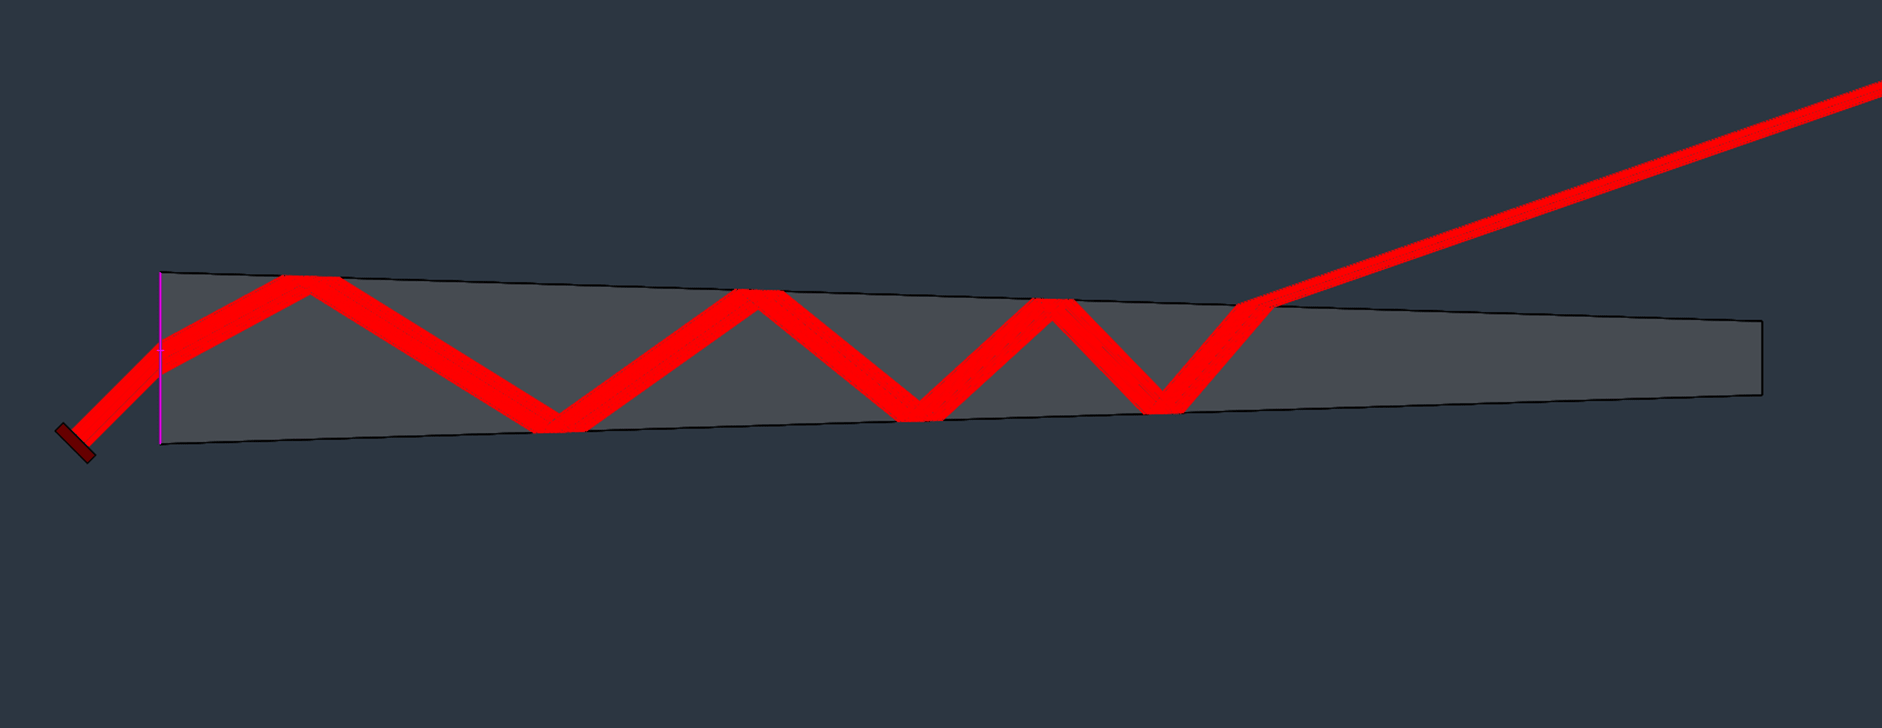
All of these collisions aren't good for the light though. Each boundary introduces an energy loss in the ray due to refraction at a boundary. This is the Fresnel loss. In the case of light perpendicular to the surface, the equation simplifies to:

A typical plastic-air interface might have a Fresnel loss of around 4-5%.
Light pipe principles
Looking inside our wireless charger, we see four main parts:
- Upper housing (removed in picture below)
- Lower housing
- PCB mounted at rear with charging coil, power circuit and micro USB port
- Clear plastic light pipe
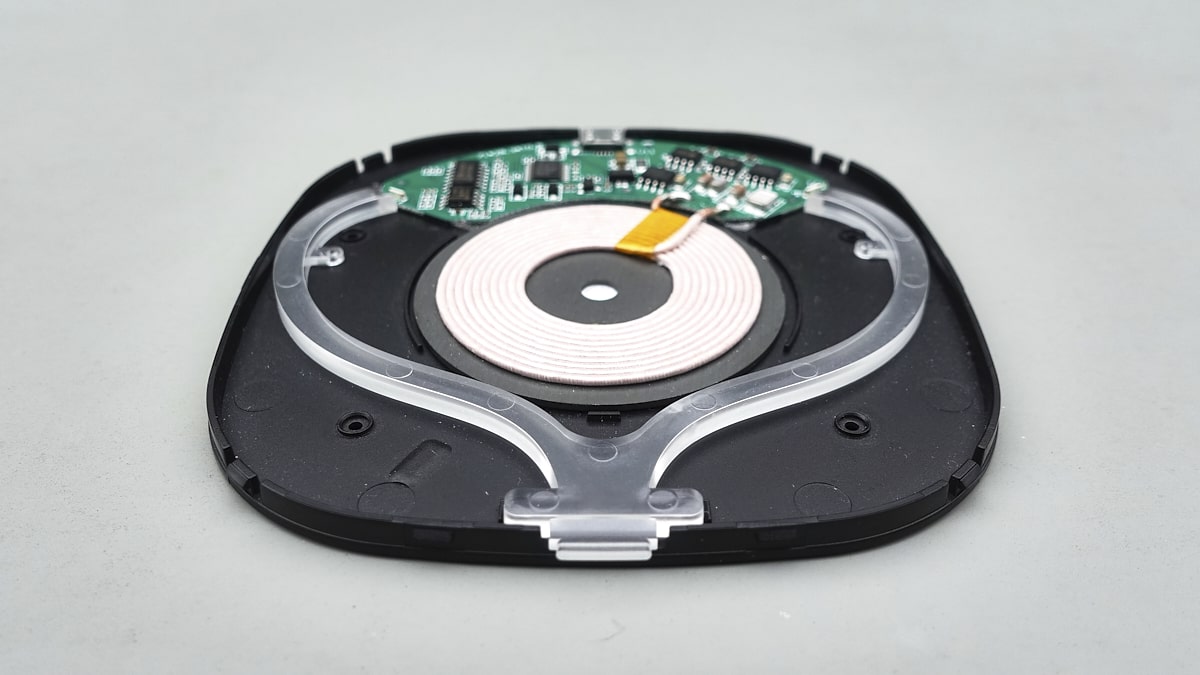
Optimising light pipe design requires keeping light inside, minimising losses during transmission, and then allowing it to leave where needed. Normally we also want the light that exits to be as diffused as possible.
Keeping light inside
There are three basic design principles for keeping light in:
- Smooth surfaces good, rough surfaces bad.
- Bend radii should be large and smooth, to avoid breaking the TIR.
- Tight coupling of the LED into the light pipe helps to capture a higher percentage of the light output.
All surfaces have a natural level of roughness but light pipes need a high reflectance at the light pipe boundaries. The more polished the mold tool (e.g. SPI-A2), the better . Counter-intuitively, adding reflective paint will keep the light in but also introduce significant losses, especially on a long pipe. Avoid this temptation and let the TIR work for you!
Unlike the pipe edges, a polished exit surface can lead to TIR where light oscillates back and forth between the entrance and exit surfaces forever. Which brings us to...
Letting light out
To break the TIR, use a rough surface to introduce microscopic surface deviations which scatter the light. As a demonstration, adding a Mold-Tech texture (e.g. MT-11070) to our light pipe exit scatters the light:

If this isn't possible, another option is using off-the-shelf diffusers. There are also plenty of ways to mix up the light inside the pipe more thoroughly, for example with bulk scattering fillers.
Light pipe efficiency
It's easy to see from this photo why our wireless charger light pipe is terrible.
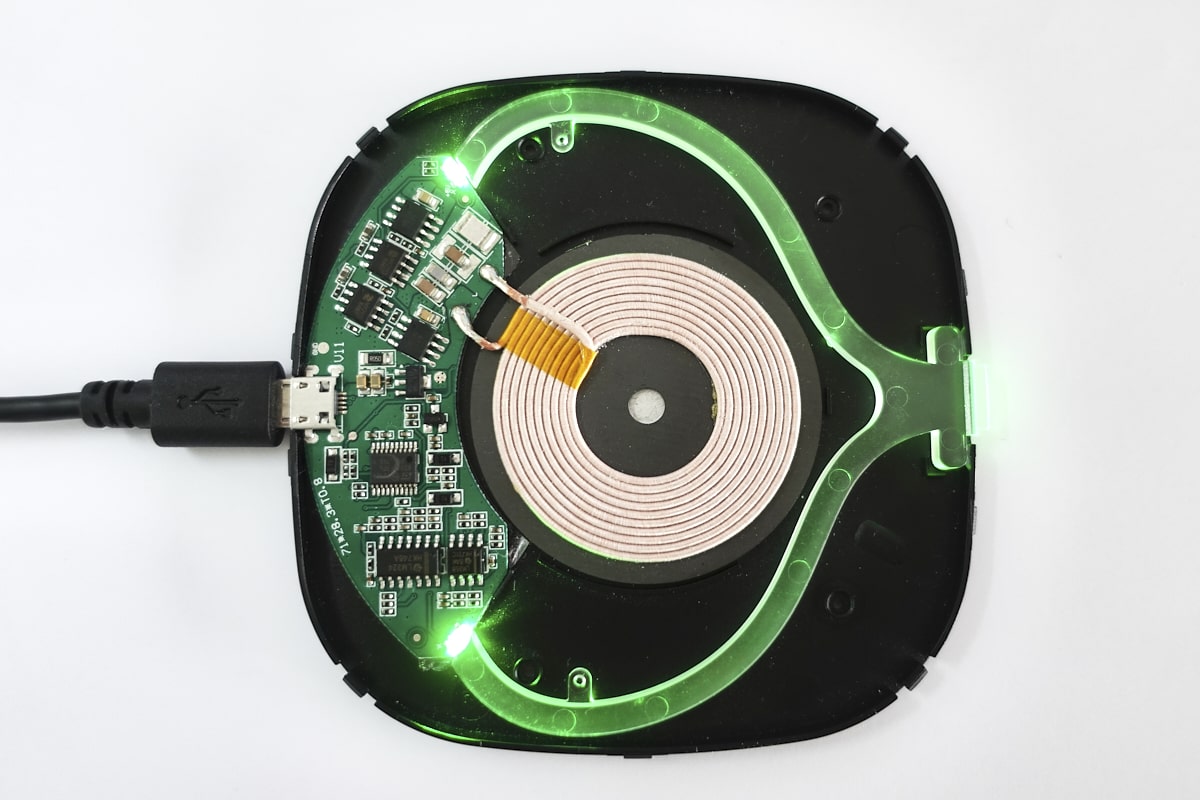
The fundamental job of a light pipe is to keep light inside the pipe. This whole pipe is illuminated along its entire length. A typical light pipe test involves visually assessing the pipe in a darkened room; the photo was shot outdoors!
But exactly how inefficient is it?
Using a reverse engineered model in SolidWorks, its easy to see that due to the offset location of the side LED, only a fraction of the light will ever enter the pipe in the first place.
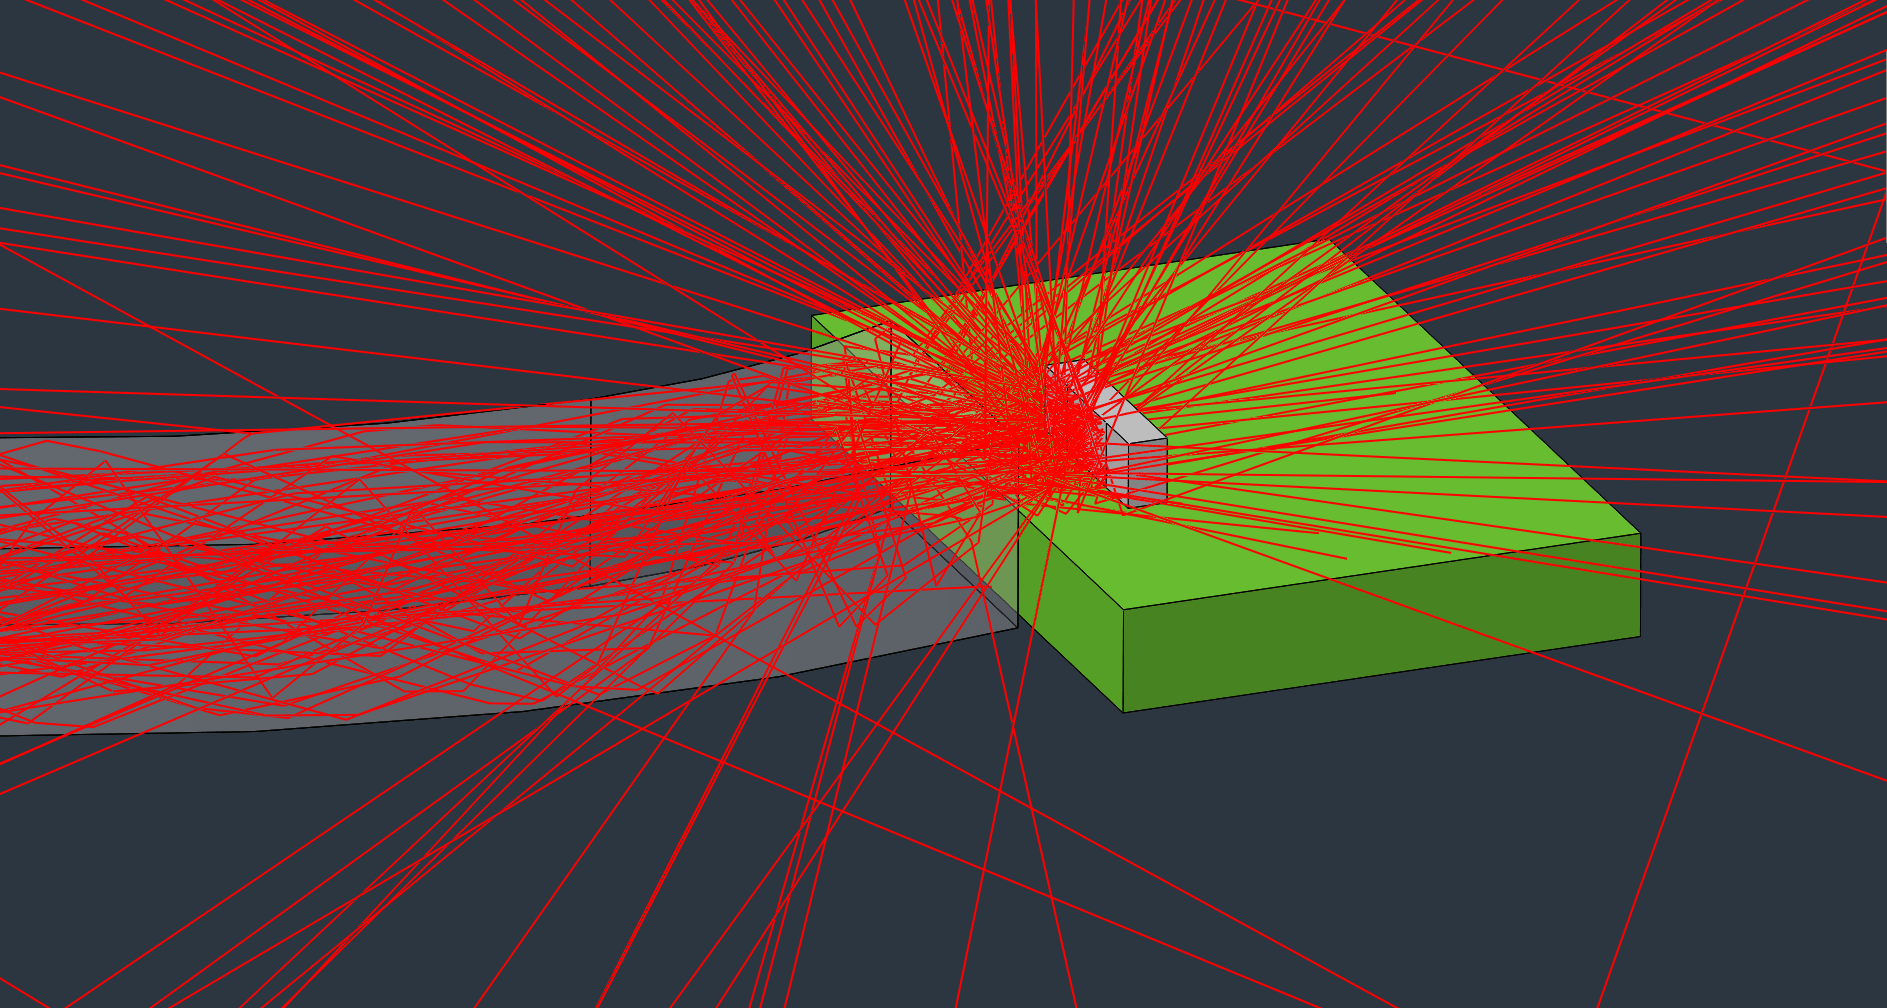
The RayViz SolidWorks plugin is good for a few thousand rays, but a TracePro simulation with 100000+ will run in a few seconds. The model below has a single LED source on the lower PCB. Since most LEDs exhibit a lambertian distribution, it doesn't really matter what this LED model is. Only light rays which reach the exit aperture are shown.
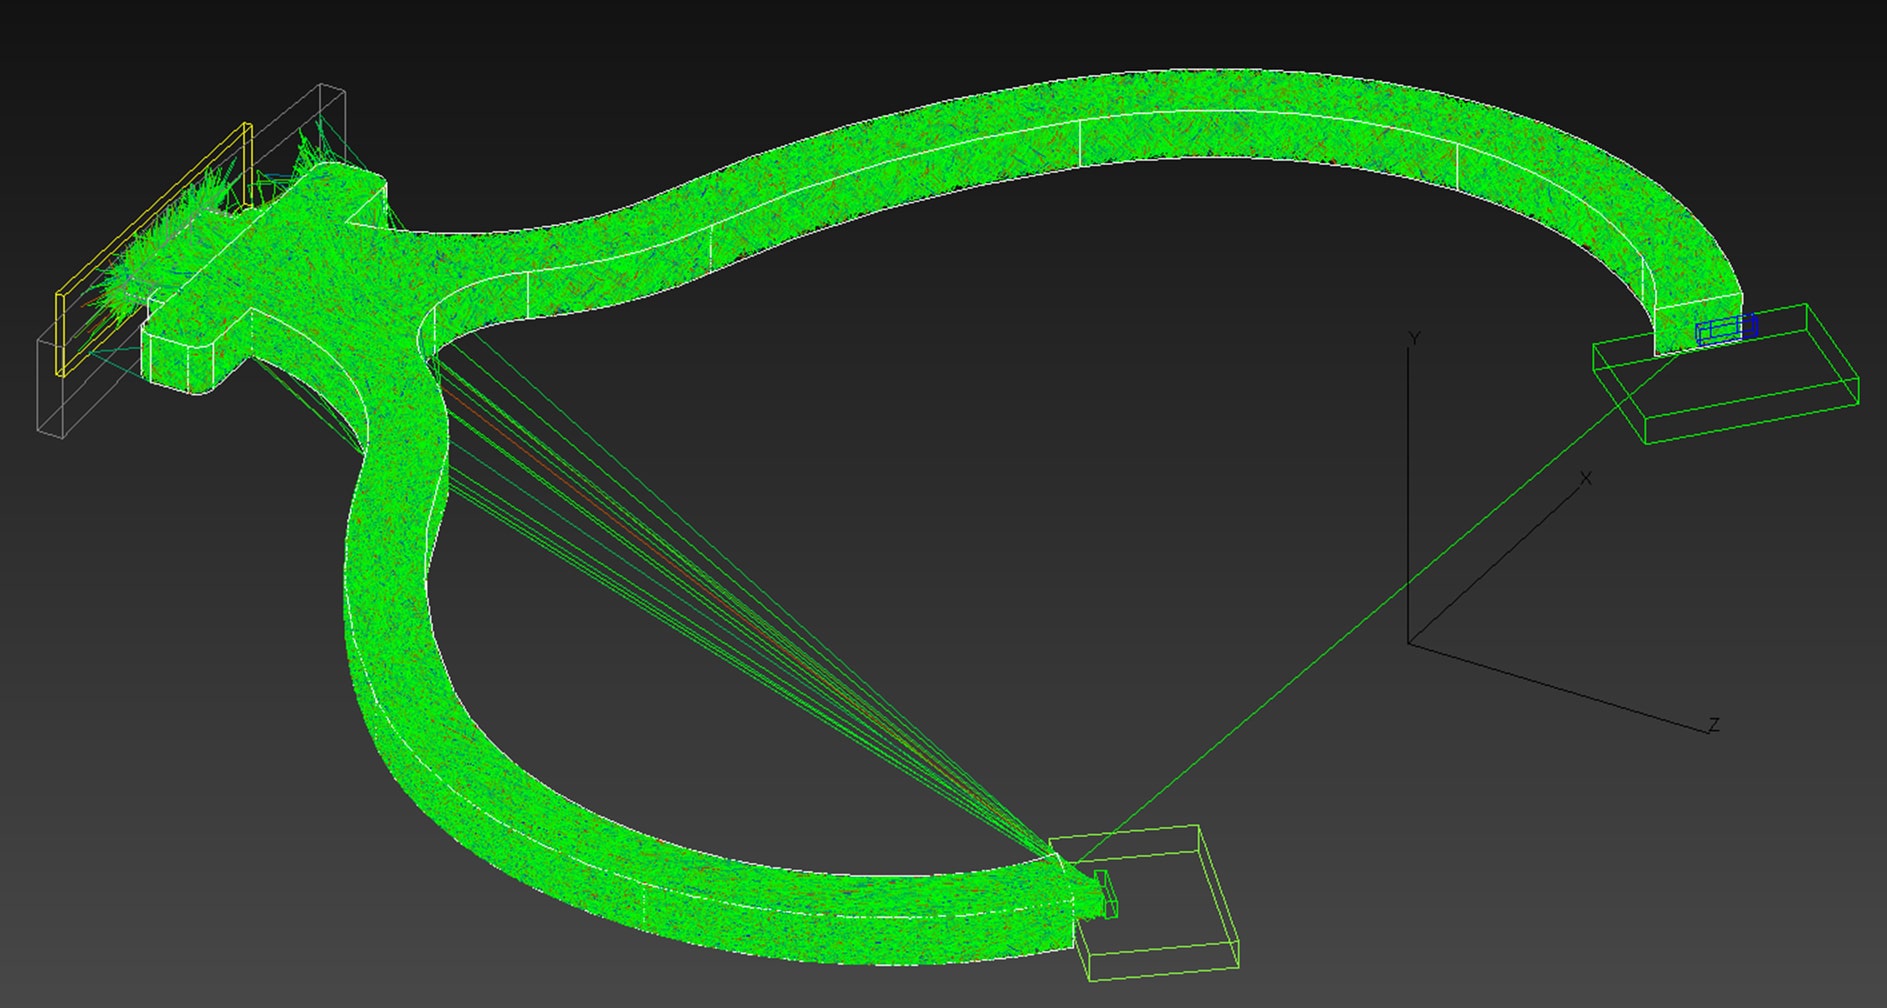
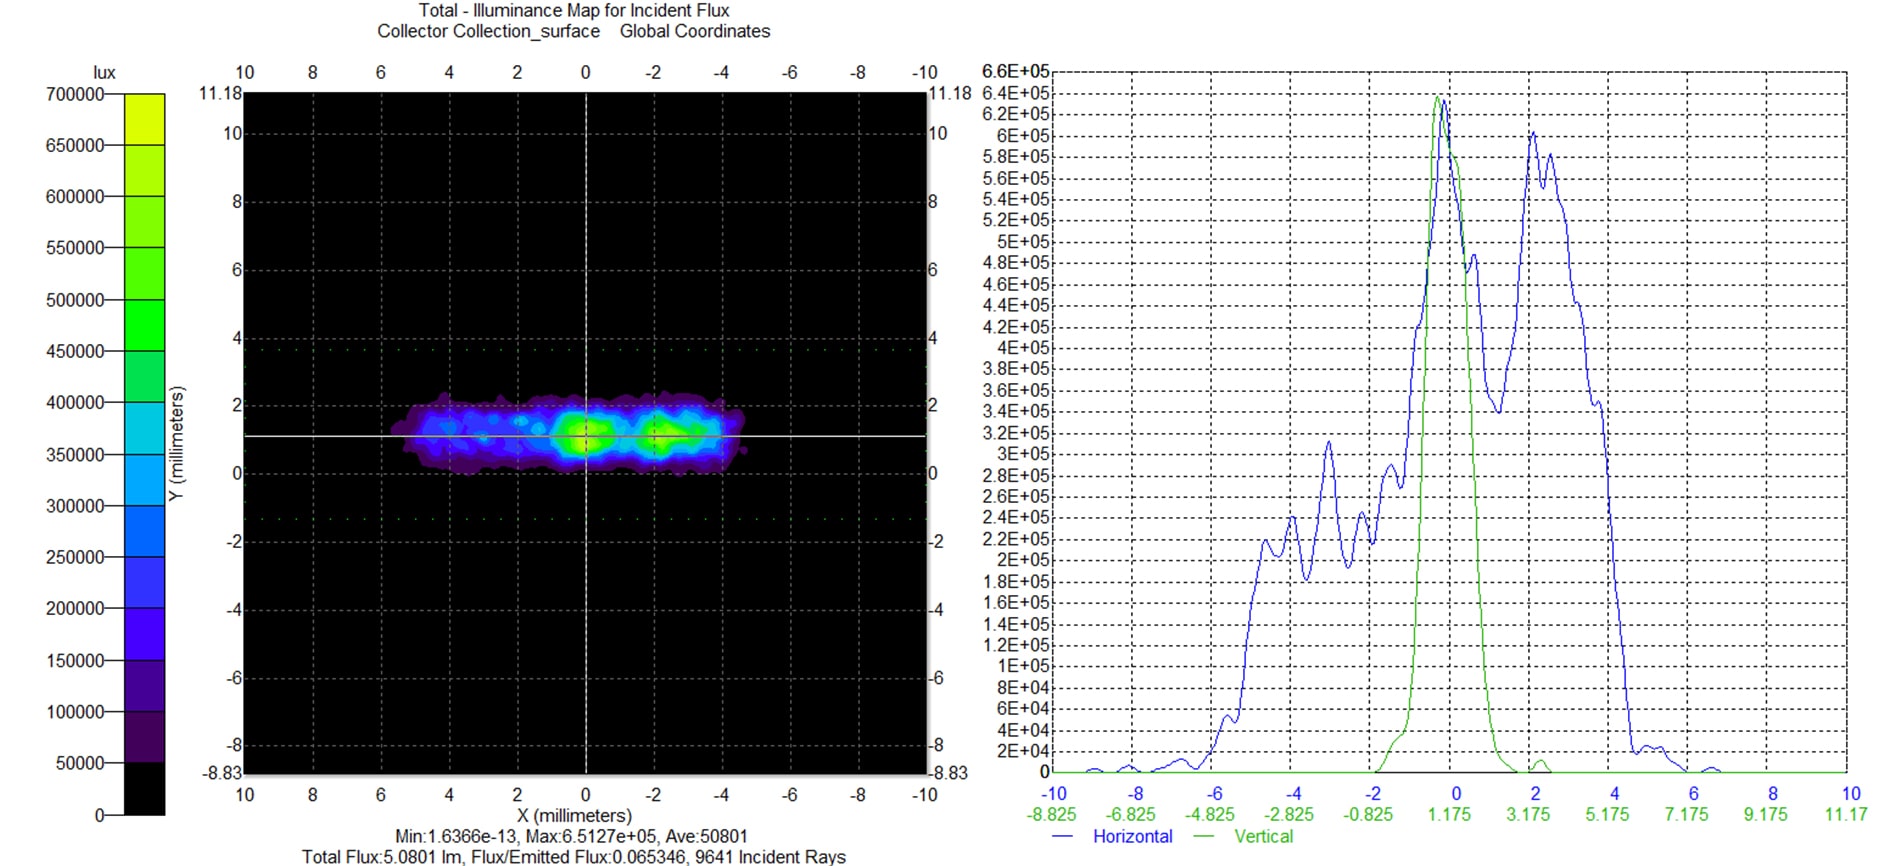
As a first measure of efficiency, we can check the illuminance map for the output surface. The Flux/Emitted Flux is 0.065. In other words, only 6.5% of the light that leaves the LED actually arrives at the output! This likely represents a best case scenario, since we haven't yet factored in the bulk scattering of light which causes the length of the pipe to illuminate as well.
Two LEDs
The analysis above shows something else. The output plot is highly-asymmetric, with a clear hotspot on the right hand side (= left hand side of aperture, as the surface is a mirror image). Here's a re-run of the simulation with two different LED sources: blue (460nm) and green (550nm).
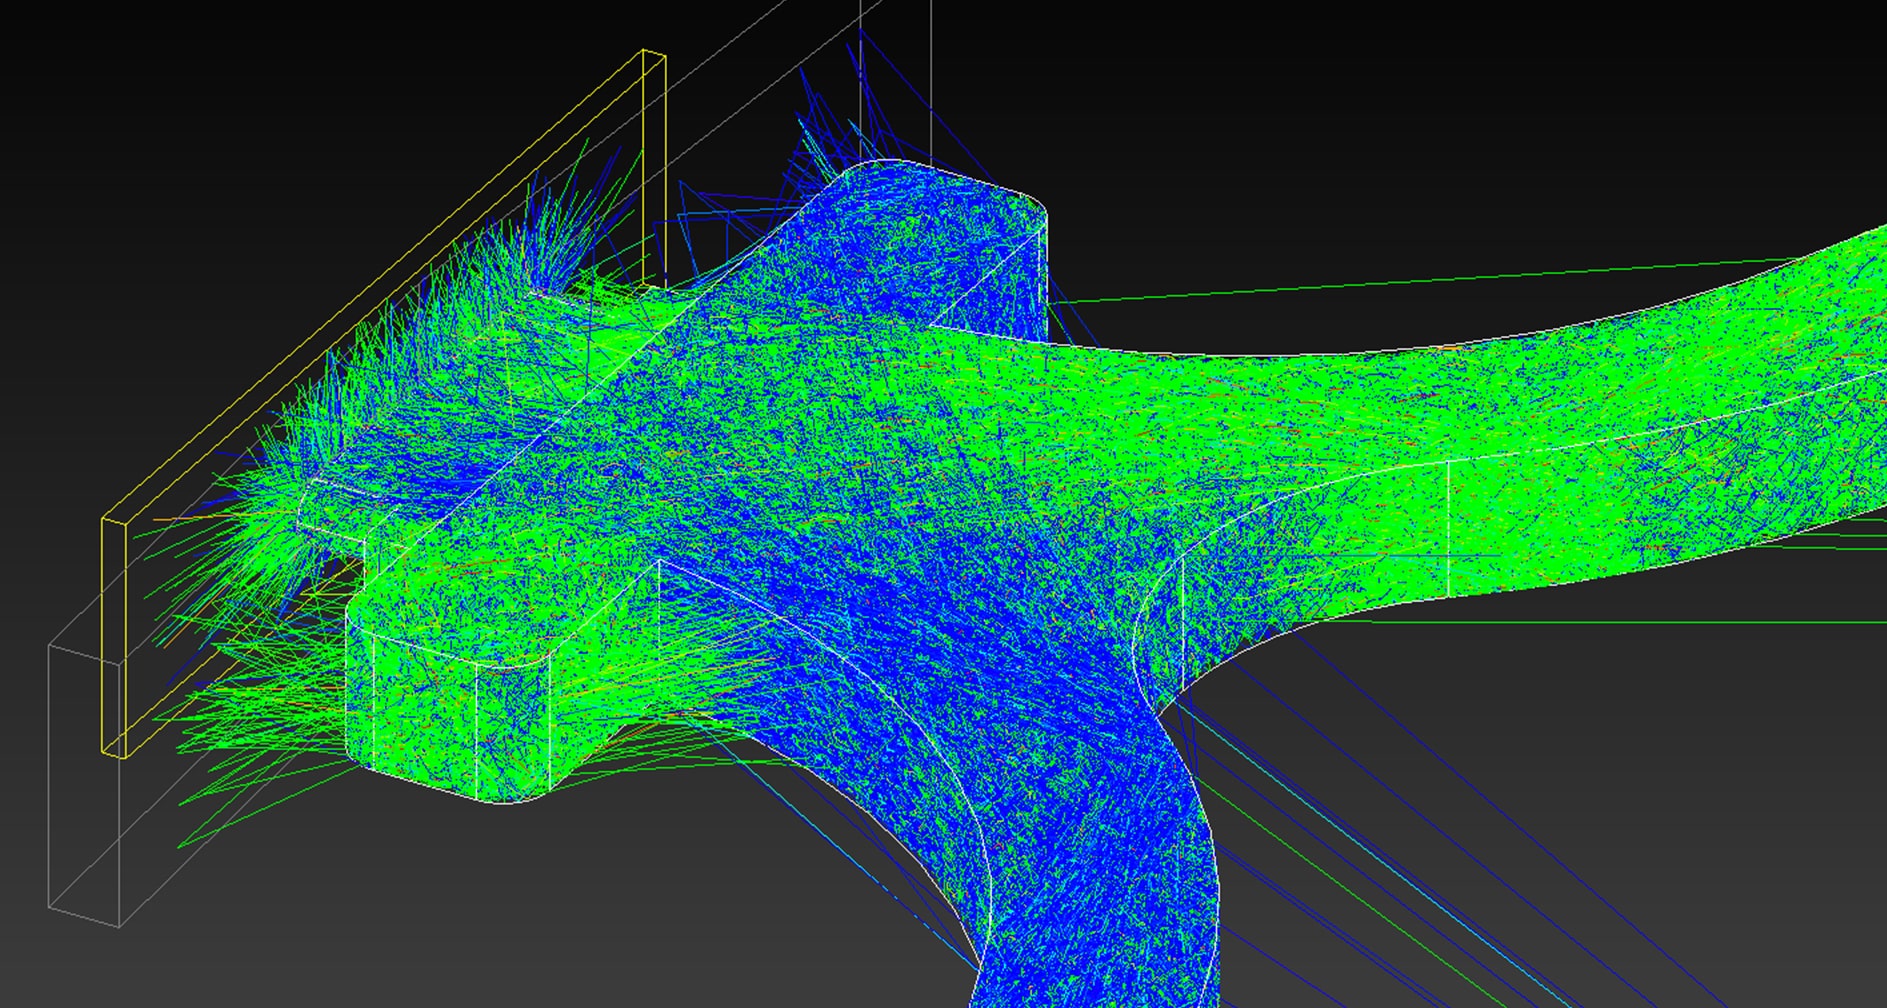
It looks messy, but how much are these rays really mixing? A true colour plot of the output surface reveals the answer... not much!
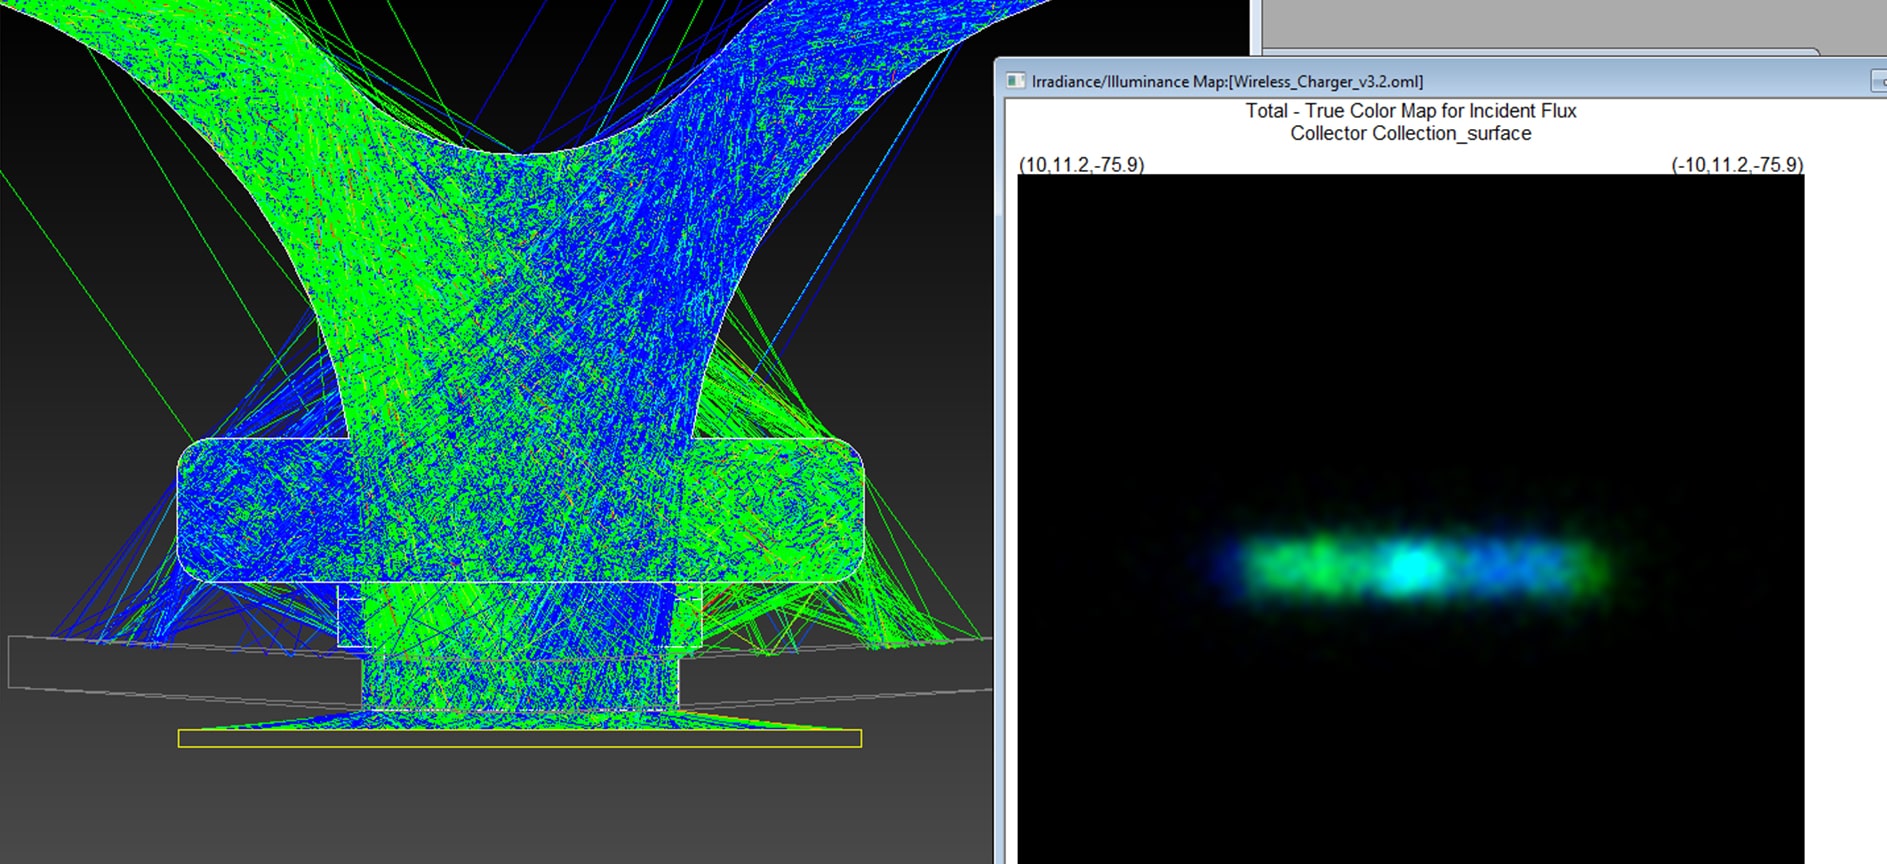
This wireless charger can indicate two different states: blue for charging and green for ready. At first I assumed that each prong was for a different LED colour, but actually both sources are a bi-colour blue/green LED. Thanks to the simulation, we now know why!
Credits
Many thanks to Dave Jacobsen at TracePro for the technical support in getting this simulation to run.

